Are you tired of relying on traditional lighting solutions for your home or outdoor space? Look no further than making oil lamps for light. With simple DIY techniques and materials, you can create your own eco-friendly and renewable lighting source. Whether you’re interested in oil lamp making, seeking oil lamp craft ideas, or looking for a tutorial on how to make oil lamps at home, this comprehensive guide has got you covered.
Key Takeaways
- Making oil lamps for light is an eco-friendly and renewable lighting solution.
- With simple DIY techniques and materials, you can create your own oil lamps at home.
- Understanding oil lamp basics and choosing the right fuel are crucial to the process.
- Gathering necessary materials and tools, preparing the oil lamp base, and crafting the wick holder are important steps in the process.
- Assembling the oil lamp, lighting and maintaining it, and enhancing its aesthetic appeal are important final steps.
Understanding Oil Lamp Basics
Before you start making your own oil lamp, it’s important to understand some of the key components and types of oil lamps available.
Oil Lamp Components
An oil lamp is composed of several basic components:
- The base – The lower part of the lamp that holds the fuel. It can be made from a variety of materials, including glass, metal, and ceramic.
- The wick – The part of the lamp that draws the fuel up to the flame.
- The burner – This holds the wick in place and regulates the amount of fuel that is fed to the flame.
- The chimney – This part of the lamp helps to direct the airflow and keep the flame stable.
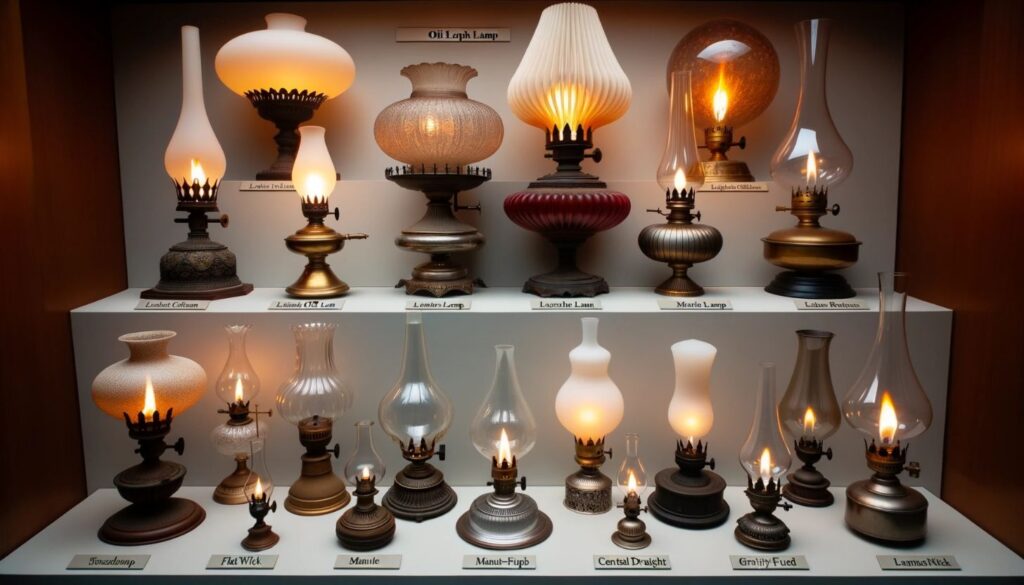
Types of Oil Lamps
There are several types of oil lamps, each with its unique features and benefits.
| Type of Oil Lamp | Description |
|---|---|
| Wick Oil Lamp | This is the most common type of oil lamp and uses a simple wick to draw fuel up to the flame. |
| Dual Burner Oil Lamp | This type of lamp uses two wicks and burners to create a brighter, more intense light. |
| Aladdin Lamp | These lamps use a special mantle that emits a bright and steady light, similar to electric light bulbs. |
Understanding the basics of oil lamps and the different types available will help you select the right lamp for your needs, and give you the knowledge necessary to create your own unique DIY oil lamp.
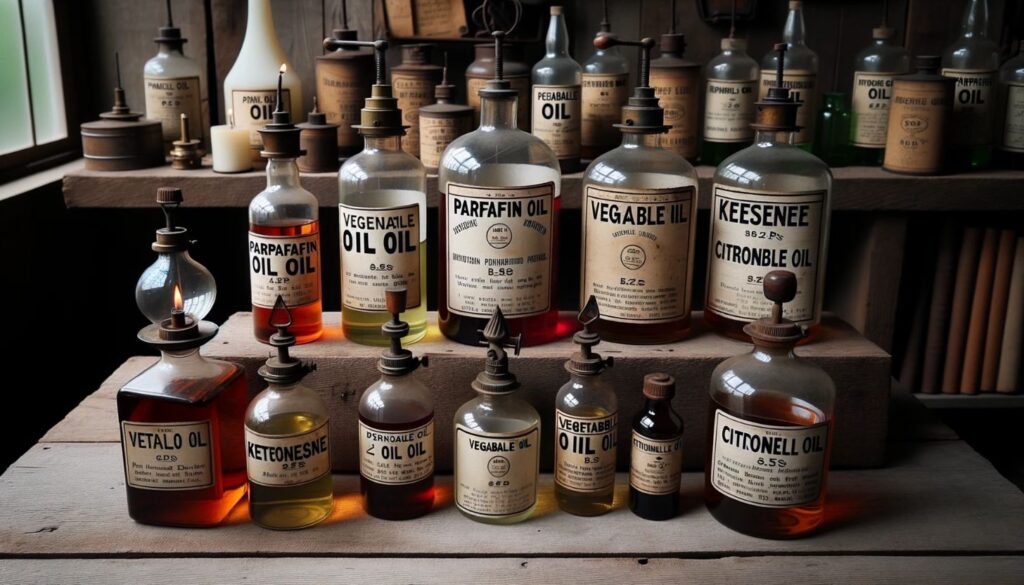
Choosing the Right Fuel for Your Oil Lamp
Now that you understand the different components of an oil lamp and the types available, it’s time to choose the right fuel. The fuel you choose will determine how efficiently your oil lamp burns and how much light it produces. Additionally, you may want to consider eco-friendly options that minimize environmental impact.
Some of the most common oil lamp fuel types include kerosene, lamp oil, and paraffin. Kerosene is a popular choice because it burns cleanly and efficiently, but it can emit an unpleasant odor. Lamp oil is a more expensive but cleaner-burning fuel, producing less smoke and odor. Paraffin is a petroleum-based fuel that is widely available and affordable.
If you’re looking for an eco-friendly option, consider using vegetable oil or beeswax candles. Vegetable oil burns cleanly and can be sourced from renewable resources, while beeswax candles emit a pleasant scent and burn without producing soot or smoke.
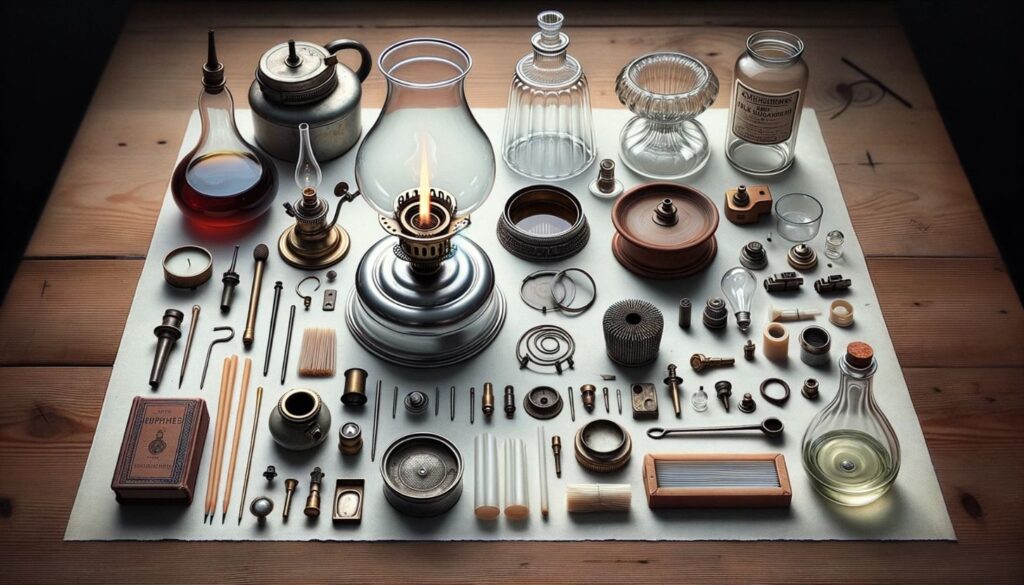
Gathering Materials and Tools
Before you can create your own oil lamp, you need to gather the necessary materials and tools. Knowing what you need and how to acquire it can make the difference between a successful DIY project and a frustrating one.
Oil Lamp Materials
The first thing you’ll need is a lamp base. This can be made from a variety of materials, including ceramics, glass, metal, or even natural objects like stones or seashells. Choose a base that fits your taste and the intended use of your lamp. You’ll also need a wick, which can be made from cotton or other suitable materials. The wick should be the right size for your lamp’s holder and fitted snugly into place.
Additionally, you’ll need a fuel container, which is responsible for holding the oil. This can be made from the same materials as the base or from a separate container that fits inside the base. Some designers opt to use recycled materials, like old glass bottles or coffee cans, for added sustainability.
Oil Lamp Making Tools
Once you have your materials, you’ll need some basic tools to assemble your lamp. You may need pliers, a knife, a funnel, and a pair of scissors. A hot glue gun can also be useful for securing the wick in place. You may also need sandpaper to smooth out rough edges and surfaces.
DIY Oil Lamp Supplies
As you gather your materials and tools, keep in mind that there are many creative ways to acquire what you need. Try scouring thrift stores or online marketplaces for unique and affordable lamp bases. Look for cotton at local fabric stores or repurpose old clothing. If you’re crafty, you can make your own fuel container with materials like clay or glass. The possibilities are endless, all you need is a little imagination and resourcefulness.
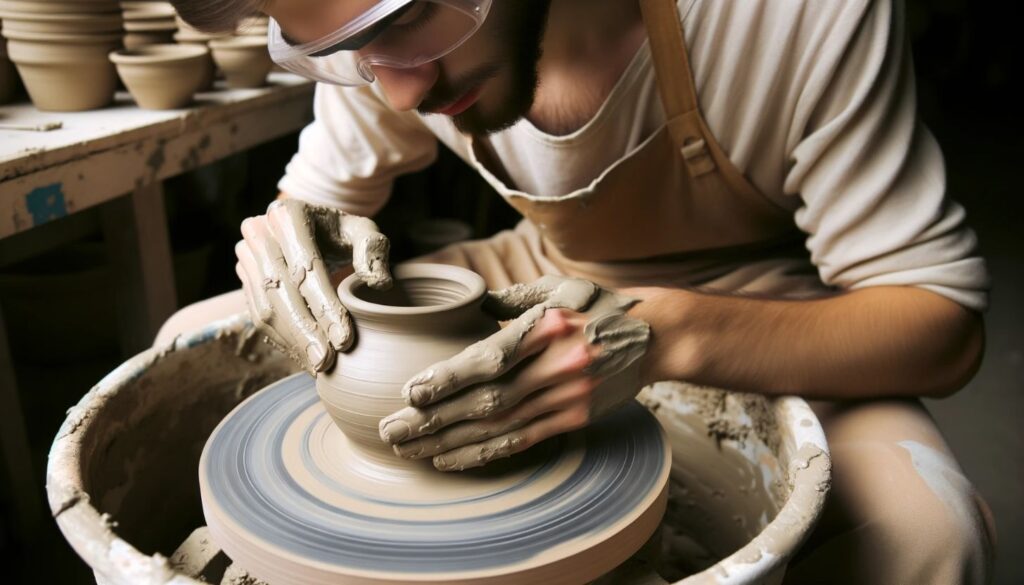
Preparing the Oil Lamp Base
The base of your oil lamp is an important component that provides stability and support. There are several materials you can use to create your DIY oil lamp base, including clay, wood, metal, and glass. You can also repurpose an old vase, bottle, or jar to serve as the foundation for your oil lamp.
When selecting materials for your oil lamp base, consider the weight and size of the lamp. You want to ensure the base is sturdy enough to support the rest of the lamp without tipping over. If you’re using a repurposed item, check to make sure it has no cracks or damage that could compromise its stability.
Once you’ve chosen your materials, it’s time to shape and decorate your oil lamp base. You can use a variety of tools to create decorative patterns, such as a drill, hammer, or paint. Be sure to let any paint or glue dry completely before proceeding to the next step.
Decorating the Oil Lamp Base
One popular way to decorate your oil lamp base is with mosaic tiles. These small tile pieces can be arranged in various patterns and colors to create a unique and eye-catching design. To attach the tiles, you’ll need some tile adhesive and grout. Spread the adhesive over the base and press the tiles firmly into place. Once the adhesive has dried, apply the grout to fill in the gaps between the tiles.
You can also paint or etch a design onto the base using stencils or free-hand. Another option is to wrap the base with twine, ribbon, or wire for a rustic look.
Regardless of which decoration method you choose, be sure to let the base dry completely before proceeding to the next step.
Crafting the Wick Holder
Crafting a sturdy and efficient wick holder is essential to the functionality of your oil lamp. Fortunately, making a DIY wick holder is simple and cost-effective. Here’s how:
- Start by gathering the necessary materials: a piece of wire, pliers, and a small metal washer or other flat object.
- Bend the wire into a U-shape, leaving a small loop at the bottom for the wick to rest on. The two ends of the wire should be long enough to wrap around the top of your oil lamp base.
- Using the pliers, create a small loop at the top of each wire end. These loops will serve as hooks for attaching the wick holder to the oil lamp base.
- Thread the wire through the washer or flat object, sliding it down to the bottom loop.
- Wrap the wire ends around the top of your oil lamp base, stretching the wire taut so that the wick holder remains upright.
- Test the wick holder by inserting a wick into the bottom loop and adjusting its position. The wick should rest securely in the holder and be able to move up and down as needed.
With your homemade wick holder complete, you’re ready to move on to assembling your oil lamp.
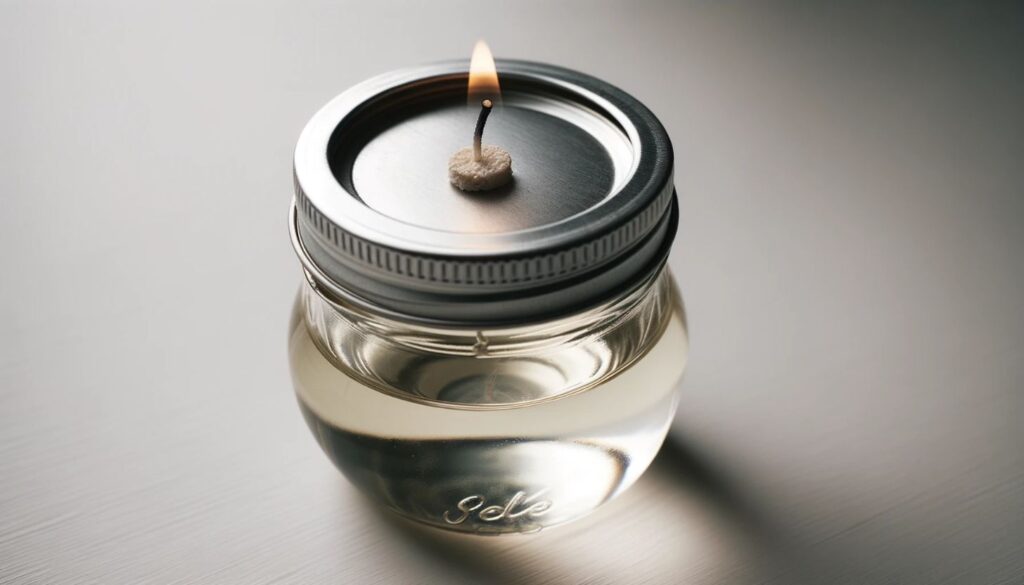
Assembling the Oil Lamp
Now that you have the oil lamp base and the wick holder prepared, it’s time to assemble your homemade oil lamp. Here are some easy steps to help you with the DIY oil lamp assembly:
- Insert the wick through the wick holder, making sure that it sticks out a bit on both ends.
- Place the wick holder into the oil lamp base, ensuring it sits firmly and centrally.
- Carefully pour the oil into the base, making sure that the wick is sufficiently soaked.
- Light the wick, and your oil lamp should start working.
Remember to keep the oil level topped up and trim the wick regularly to maintain a consistent flame.
Always follow safety precautions when assembling and using your oil lamp, and keep it away from flammable materials or objects.
With these simple steps, you can enjoy your DIY oil lamp that you made with your own hands. Congratulations on your homemade oil lamp construction!
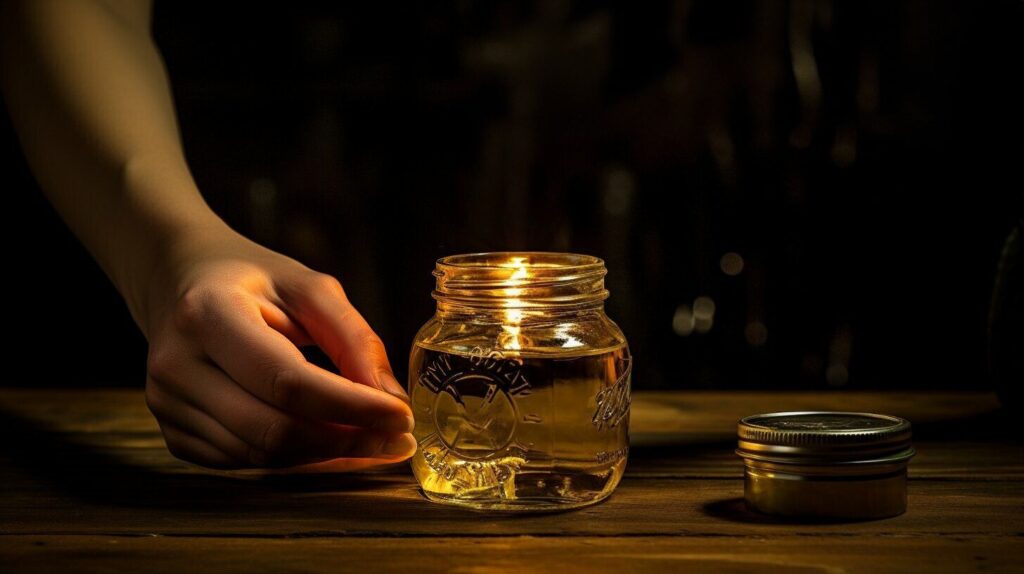
Lighting and Maintaining Your Oil Lamp
Now that you have assembled your homemade oil lamp, it’s time to get it burning brightly. Follow these simple tips to light and maintain your oil lamp for optimal performance:
Lighting Your Oil Lamp
Fill your oil lamp with the chosen fuel, being careful not to overfill. Allow the wick to soak up the fuel for several minutes before attempting to light it. Light the wick carefully with a match or lighter, taking care not to touch the flame to the lamp’s exterior. Adjust the wick to achieve the desired flame height, being mindful of the optimal height range for your chosen fuel.
Maintaining Your Oil Lamp
Regular maintenance is key to keeping your oil lamp working effectively and safely. Trim the wick regularly to remove any charred or frayed edges, and adjust the wick height as necessary to maintain a consistent flame. Keep the lamp and surrounding area clean, and store the fuel and lamp safely and securely. Avoid burning your oil lamp for extended periods, and never leave it unattended while lit.
Oil Lamp Care
To increase the lifespan of your oil lamp, it’s important to care for it properly. Use a soft cloth to clean the lamp and remove any dirt or debris regularly, and store it in a cool, dry place away from direct sunlight. Replace the wick and fuel as needed, using only high-quality materials that are compatible with your specific type of oil lamp. When not in use, cap the fuel container with a tight-fitting lid.
With proper care and maintenance, your homemade oil lamp can provide eco-friendly and renewable lighting for years to come.
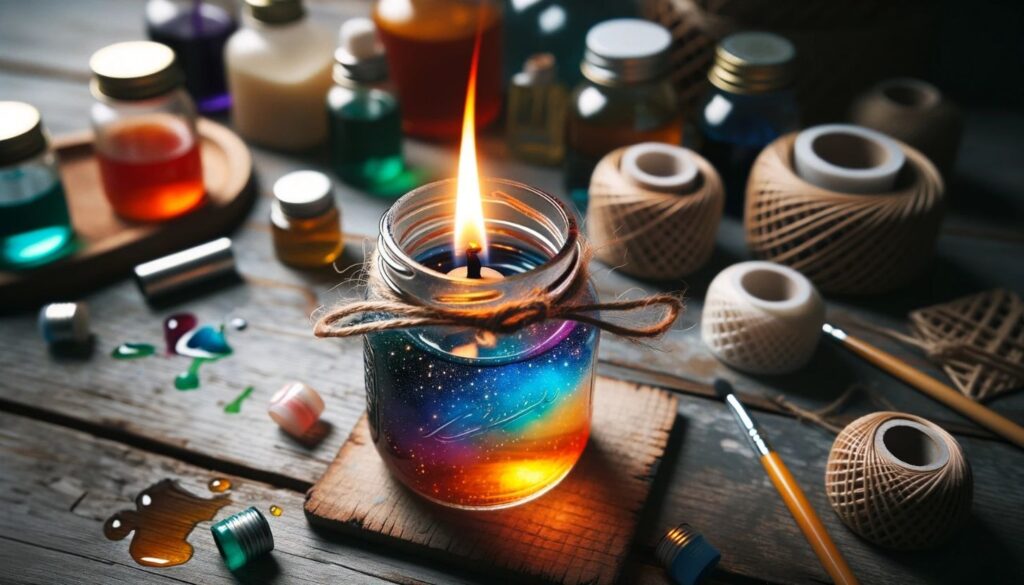
Enhancing Your Oil Lamp’s Aesthetic Appeal
Your oil lamp doesn’t have to be just a practical lighting solution. With a little creativity and inspiration, you can transform it into a work of art that complements your decor and style. Fortunately, you can decorate and design your oil lamp easily with materials readily available at home or online.
Oil Lamp Decoration Ideas
One of the simplest ways to add some flare to your oil lamp is to decorate the base: wrapping it with twine, ribbon, or fabric. You can also wrap around the wick holder with the same materials to give it additional texture or color. Another option is to add decorative accents, such as beads, sequins, or shells, to the base.
If you want to get more creative, try painting your oil lamp base with acrylics or decoupage it with patterned paper. You could also try adding a mosaic pattern using small tiles or glass pieces.
Another idea is to use natural elements for oil lamp decoration. For example, you could attach small branches or leaves to the base, or create a base entirely of stone or wood.
DIY Oil Lamp Designs
You can easily create a unique oil lamp design that suits your style and preferences. For example, you could make a Himalayan salt lamp oil diffuser by drilling a hole through the center of a salt lamp and placing an oil lamp insert into it. You could also design your own oil lamp base using wire, mesh, or clay to mold it into your desired shape and size.
Another option is to repurpose old items as your oil lamp design. For example, you could use an antique teapot or mason jar as the base of your oil lamp, or you could attach an old doorknob or drawer pull to the top of the wick holder as a decorative accent.
Creative Oil Lamp Ideas
Think outside the box when it comes to using your oil lamp. For example, you could create an outdoor chandelier by placing several oil lamps in a hanging basket or lantern, or you could place a few oil lamps on a decorative tray to create a centerpiece for your dining table.
You could also create a unique ambiance by using colored oils or different types of wicks. Try using a colored oil to create a warm, romantic glow, or use a citronella oil to repel insects while enjoying outdoors.

Get inspired and let your creativity flow when it comes to enhancing your oil lamp’s aesthetic appeal. With a little effort and imagination, you can create an oil lamp that not only provides light but also adds a touch of beauty and personality to any space.
Exploring Advanced Oil Lamp Techniques
Once you have mastered the basics of oil lamp making, it’s time to explore advanced techniques and take your craft to the next level. Whether you’re looking to create a stunning centerpiece for your home or an eye-catching outdoor lighting display, there are countless ways to elevate your oil lamp projects.
One advanced technique is to experiment with different fuel types. While traditional oils may be the most common, there are other eco-friendly options to consider. For example, try using vegetable oil or beeswax as your fuel source. These alternatives burn cleaner and emit less smoke, creating a more pleasant and sustainable light source.
Another way to take your oil lamp crafting to the next level is to incorporate unique designs and accents. Consider adding decorative elements such as shells or crystals to your base, or exploring creative ways to shape your wick holder. By embracing your creativity, you can create a one-of-a-kind oil lamp that truly shines.
If you’re looking for inspiration, there are plenty of advanced oil lamp projects to explore. From intricate multi-wick designs to whimsical animal-shaped lamps, there are endless possibilities to unleash your creativity. Consider joining the oil lamp making community to connect with other enthusiasts, share your projects, and discover new techniques.

As you continue to explore advanced oil lamp techniques, remember to prioritize safety and functionality. Always use caution when working with flammable materials, and ensure your oil lamp is stable and secure before lighting. By taking proper precautions and embracing your creativity, you can create stunning oil lamps that illuminate your space and showcase your unique style.
Sharing Your Oil Lamp Making Journey
Congratulations on creating your own eco-friendly oil lamps! The satisfaction of making something with your own hands is immense, and it’s only natural to want to share your experience with others.
The oil lamp making community is a vibrant and supportive group of enthusiasts who love to share their DIY oil lamp projects and tutorials. Connect with like-minded individuals by joining online forums, groups, and social media communities dedicated to oil lamp making. Share photos of your completed oil lamps and inspire others to embark on their own DIY journey.

Not only can you find inspiration and guidance from other enthusiasts, but you can also contribute to the community by sharing your own knowledge and experience. Consider creating your own oil lamp tutorial or sharing tips and tricks you’ve learned along the way. You never know who you might inspire to start their own oil lamp making adventure!
As you become more involved in the community, you may even want to attend oil lamp making workshops or events. These provide an excellent opportunity to connect with fellow enthusiasts in person, learn new techniques, and gain valuable insight from experienced professionals.
Embrace the oil lamp making community and enjoy the support and inspiration it provides. Who knows, you may even make some lifelong friends along the way!
Conclusion
Creating your own oil lamps provides an incredibly rewarding and enriching DIY experience. By following the steps in this comprehensive guide, you can successfully craft elegant, eco-friendly lighting solutions using basic techniques and readily available materials.
The journey starts by understanding oil lamp components, choosing an appropriate fuel, and gathering the necessary tools and supplies. Once you have prepped your materials, you can begin assembling the lamp base, crafting the wick holder, and putting all the pieces together.
For an extra creative spark, decorate your lamp with accents and embellishments to make it truly unique.
FAQ
What is this guide about?
This guide is about making oil lamps for light using DIY techniques.
What will I learn from this guide?
You will learn how to make oil lamps, understand the basics, choose the right fuel, gather materials and tools, prepare the lamp base, craft the wick holder, assemble the oil lamp, light and maintain it, enhance its aesthetic appeal, explore advanced techniques, and share your journey.
Why should I make oil lamps?
Making oil lamps allows you to create your own eco-friendly lighting solution and explore your creativity.
Are oil lamps safe?
When used properly and with caution, oil lamps can be safe. However, it’s important to follow safety precautions and guidelines.
What fuel should I use for my oil lamp?
There are different fuel options available, including traditional oils and eco-friendly alternatives. You can choose based on factors such as cleanliness, longevity, and environmental impact.
Can I repurpose materials for making oil lamps?
Yes, you can creatively source or repurpose materials for your DIY oil lamp project.
How do I assemble an oil lamp?
Follow our step-by-step instructions to ensure each component fits securely and functions properly. Consider factors such as fuel placement, wick trimming, and safety precautions.
How do I light and maintain my oil lamp?
Learn proper lighting techniques, tips for maintaining a consistent flame, and essential care practices to extend the lifespan of your oil lamp. We also provide troubleshooting guidance.
How can I enhance my oil lamp’s aesthetic appeal?
Discover various ways to decorate and design your oil lamp, from simple accents to more elaborate ideas. Let your creativity shine.
Are there advanced techniques for oil lamp making?
Yes, once you master the basics, you can explore advanced techniques, unique projects, and creative designs to elevate your craft.
Can I share my oil lamp making experience?
Absolutely! Connect with the online oil lamp community, share your projects and tutorials, and inspire others with your journey.